Introduction
Already supported by the majority of OS platforms, Microsoft Multipath I/O (MPIO) optimizes storage performance and provides fault-tolerant connectivity to storage. This document addresses how to configure MPIO in Windows 2012.
• Before starting, please ensure that you already understand how to configure Windows iSCSI initiator.
• If you are not familiar with basic Windows iSCSI configuration with AccelStor NeoSapphire, please refer to the document entitled “How to Configure Windows iSCSI initiator with AccelStor NeoSapphire” before proceeding.
Use Case
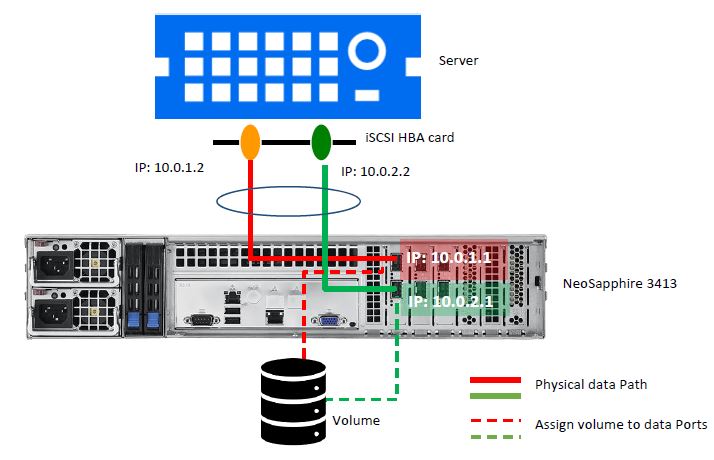
Multipath I/O recognizes and manages redundant data paths to an individual volume (refer to the physical cabling of the red and green lines in the Use Case diagram). It ensures greater reliability through a path failover mechanism in the event of cabling or component failure, and multiple data paths can be employed to provide greater aggregate throughput than one path can provide.
NeoSapphire
1. Configure network ports in System > Network > Data Port.

2. Create a volume test in Share > Volume Management.

3. Create two targets with different IP addresses in Share > iSCSI.
3.1 Assign the volume test to the iSCSI target “test1” with IP 10.0.1.1.
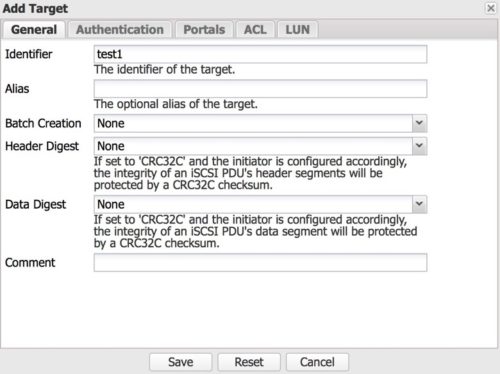
Enter the “test1” iSCSI target identifier in Share > iSCSI > General.
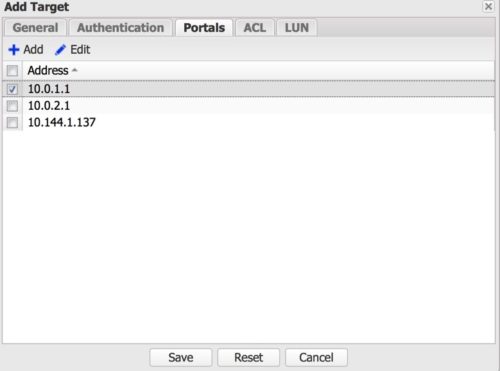
Tick the check box “10.0.1.1” in Share > iSCSI > Portals.
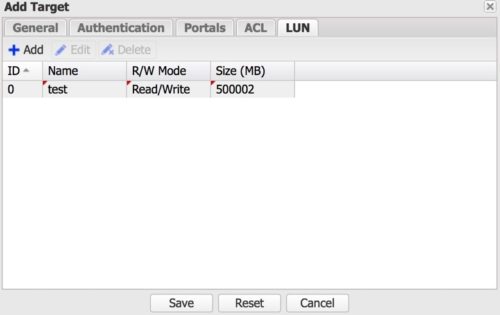
Assign a volume test in Share > iSCSI > LUN.
3.2 Assign the volume test to iSCSI target test2 with IP 10.0.2.1.
Enter the target “test2” identifier in Share > iSCSI > General.
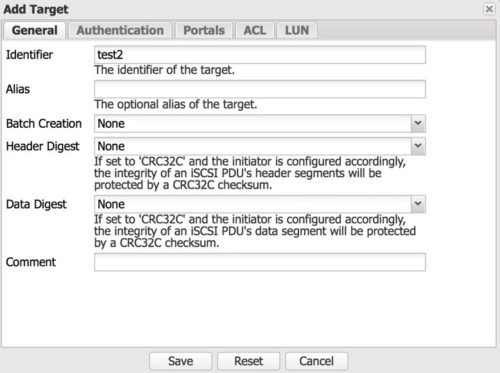
Tick the check box “10.0.2.1” in Share > iSCSI > Portals.
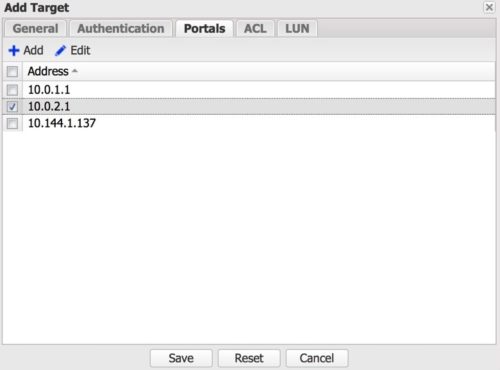
Assign a volume test in Share > iSCSI > LUN.
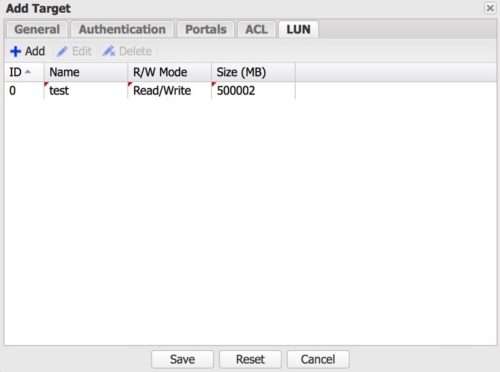
3.3 A volume goes through two iSCSI targets with two IP addresses separately.

Windows2012
1.Configure two network interfaces and make sure the network connection works properly.
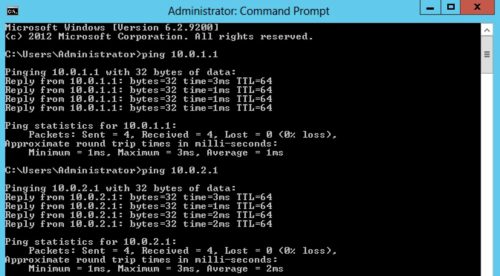
2. Open the iSCSI Initiator and add two iSCSI targets from NeoSapphire as follows:
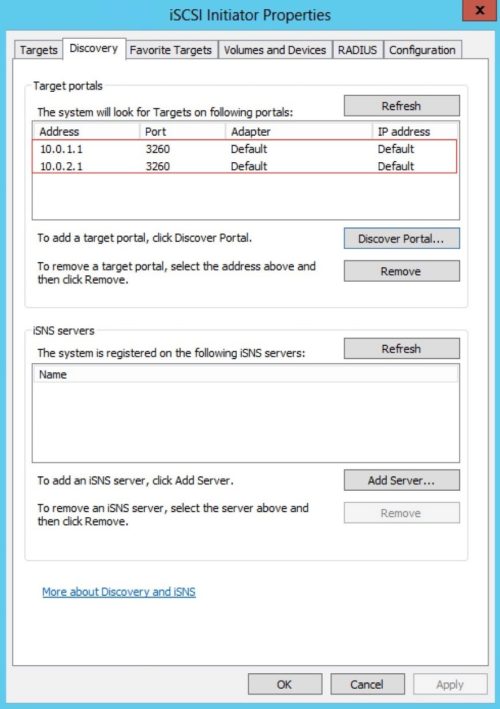
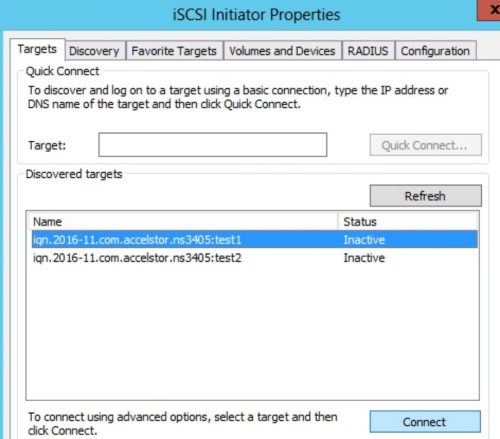
3.Switch to the Targets tab. Select the first target and click Connect.
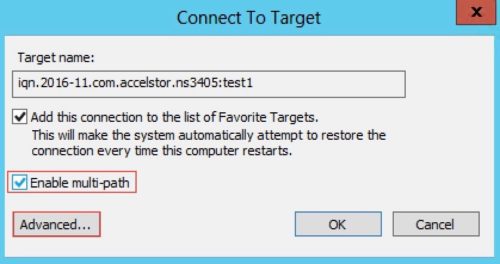
4.Tick the checkbox “Enable multi-path” and click Advanced.
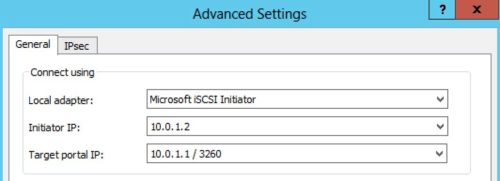
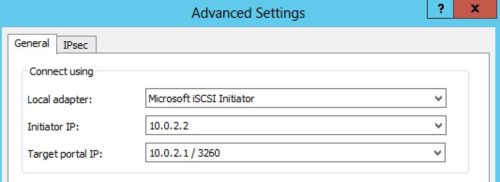
5.Select the corresponding iSCSI initiator and target as follows:
6.Repeat the steps starting from Step 3 to configure the second iSCSI target.
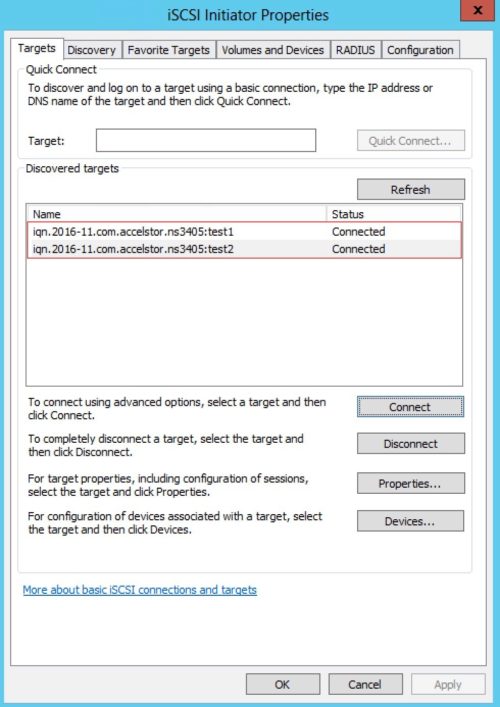
7.Two iSCSI targets are connected with iSCSI initiators in Windows.
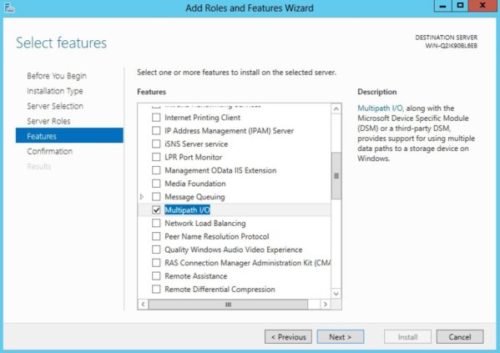
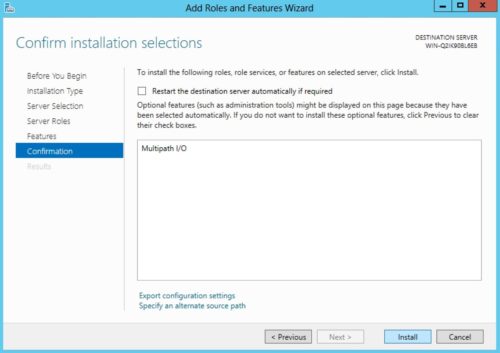
8.Enable MPIO. Open Server Management -> Add Roles and Features -> Features. Tick the “Multipath I/O” checkbox.
9.Open MPIO. Tick the “Add support for iSCSI devices” checkbox and click Add.
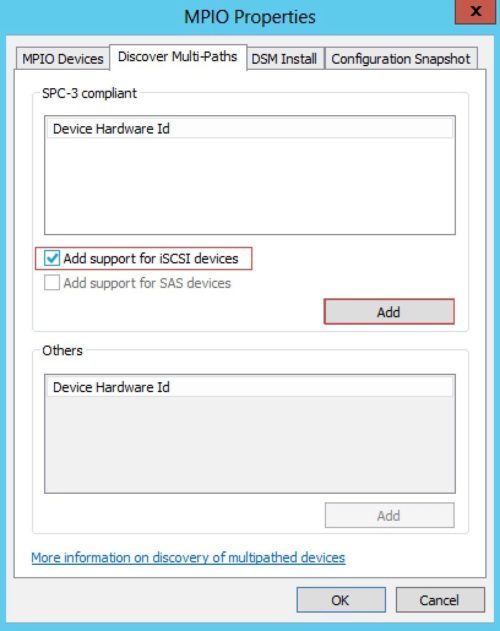
Reboot Windows.

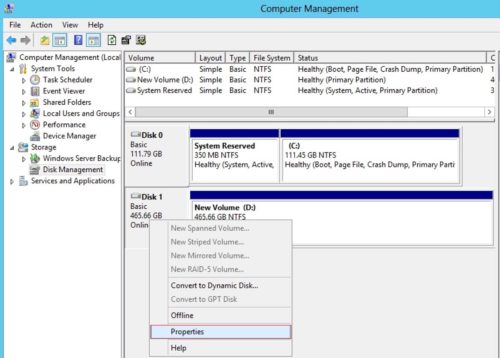
10.Open Computer Management. Right-click on the disk you created (in this case, Disk 1) and select Properties.
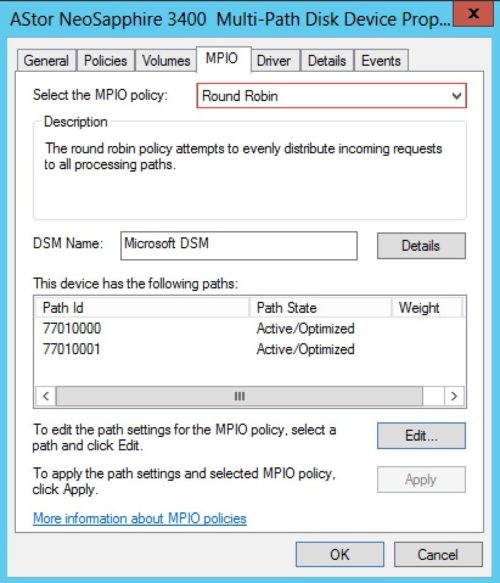
11.Switch to the MPIO tab. The new disk is available with two Active/Active paths.
12.Check that MPIO is working correctly.
Step 1. Open Computer Management > View > Check “Show hidden devices”
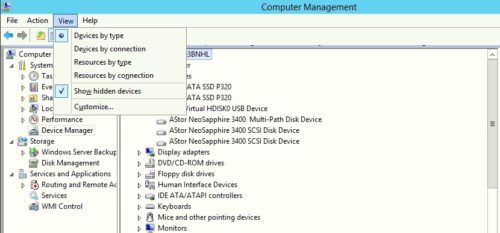
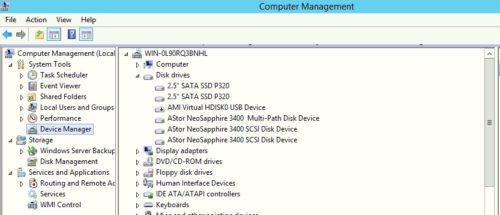
Step 2. Click Device Manager and then check that the Multi-Path Disk Device and Path appear, and that the number of paths is correct. In this case, you should see two paths (Assigned Volume to path 1: 10.0.1.1 and path 2: 10.0.2.1).
Step3. Run a benchmark tool to see if performance has been enhanced. (This assumes the original performance bottleneck was related to data path bandwidth.)
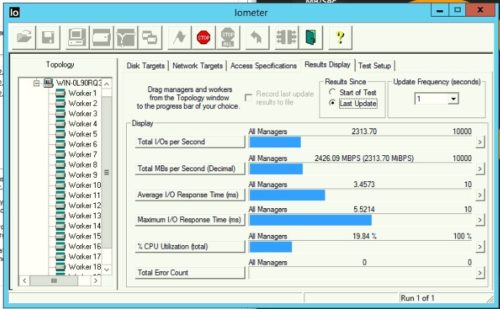
In this case, we connected two 10GbE iSCSI cables between the server and storage. One 10GbE iSCSI cable can offer up to around 1,100 MBPS. Two paths means it can support up to around 2,200 MBPS to a volume.


 Назад
Назад